
Look for the Force Message App in the App Launcher.
As a Force Message Admin User: It has full access.
As a Force Message Power User:
a. Make sure it has read access only. It can’t create, edit, or delete anything in the org unless the admin gives access to do so. But it has read and edit access only to message channel users.
b. Tabs: Accounts, Bulk UI, Cases, Campaigns, Messages, Message Channel, Message Template, Message Channel Users, Opportunities.
As a Force Message Normal User:
- Make sure it is read access only. It can’t create, edit, or delete anything in the org unless the admin gives access to do so.
Tabs: Accounts, Bulk UI, Cases, Campaigns, Messages, Message Channel, Message Template, Message Channel Users, Opportunities.
- Log in as Admin/Power/Normal User.
- Create Simple Contact Records
Create a new contact by following the steps: Contacts – new – Fill the LastName field and save.
If Admin wants to send and receive the messages through the chat UI component, then follow the steps:
- Click the Contacts tab, click New, and make sure all these below fields are filled before saving.
a. contact phone != (not equal to) null, +911234567890 (it must have + and country code like 91)
b. consent to contact != (not equal to) null (the message sends on contact creation date irrespective of the date given in the consent to contact field)
c. Message Channel != (not equal to) null
d. Message Opt Out = (equal to) true (checked).
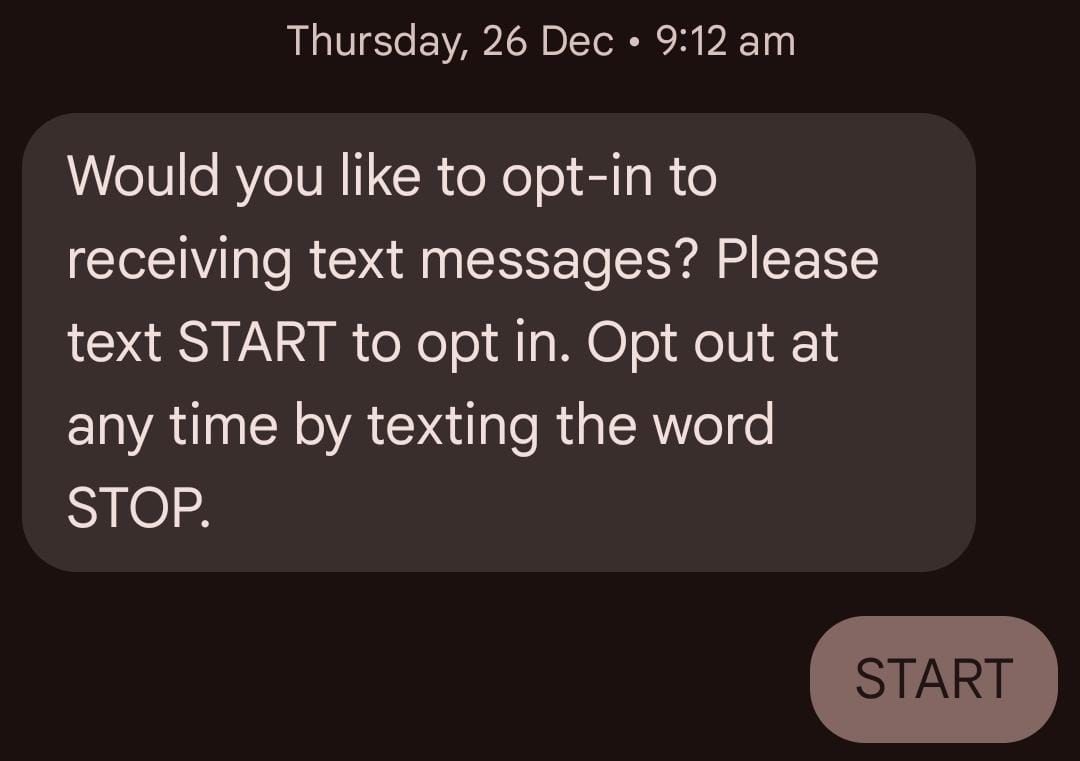
Then the default message sends to the particular contact’s phone number. If that contact wants to reply, he/she should type start/START in any case; then only can they start the conversion. Later, a period of time, if they feel they do not want to continue this conversion, they can type stop/STOP in any case. It means they can’t send any message again. If they feel like sending messages, then type start in any case, and they can start the conversion.
What can be sent by and not sent by Admin/ Power/ Normal user:
ADMIN:
As Admin/Power/Normal users can send
1.If they need to view, modify, or remove any custom or standard objects, they can do so as admin users. Proceed to Set up – Custom metadata – App settings – Manage App Settings – Fetch Object Data – Enter the necessary object’s API name in the Fetch object data field, followed by a semicolon, and click save.

2.Campaign :
This Message Recipient Picker only displays campaigns under Campaign; if a record is there, it will be displayed; if not, it won’t be.You can also look for the necessary one in the search bar.

3.Message Recipient Picker :

- a. Standard objects have icons that the user can see, but custom objects do not.
b. Below the tabs such as Message_Channel__c, Message__c, Contact, Opportunity, Lead, and Case. The user can view the total number of records. This option shows the records in two different conditions.
— > The Message Opt Out in the contact object should be true (checked) if the user selects tabs such as Contacts, Opportunity, Lead, or Case, or any other objects. The records object in those tabs should have a lookup relationship to the Contact object.
–> If the user chooses Campaign, the members object of that record should have a lookup relationship to the Contact object. If that is the case, the Message Opt Out in the Contact object should be true (checked).
c. Search Box: The two methods/conditions listed above should be met if the user searches for the member in the search box.
d. Users can view the Name and Phone columns in the data table in the message recipient picker. Records will not be displayed if the name and phone fields are null. The records in the data table are displayed if any one of the fields is null. There is a checkbox next to the name column. One hundred records are selected at a time if the user checks the checkbox. If the user wants to choose specific records, they can scroll down and choose the ones they need. Once they have chosen the records, they can see Selected Rows, which shows the number of the selected rows. By clicking Add, those records are added to the Message Recipient List.
e. Message Recipient List
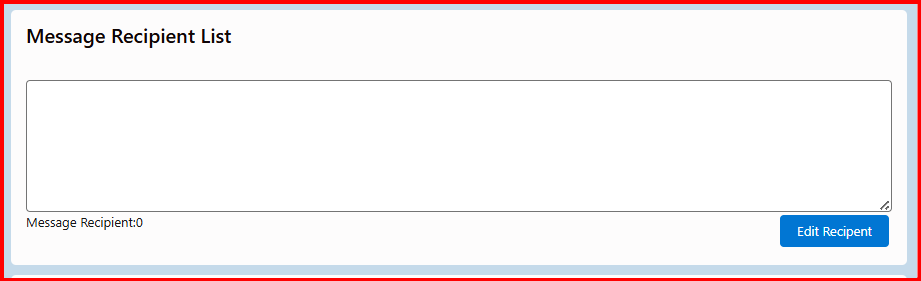
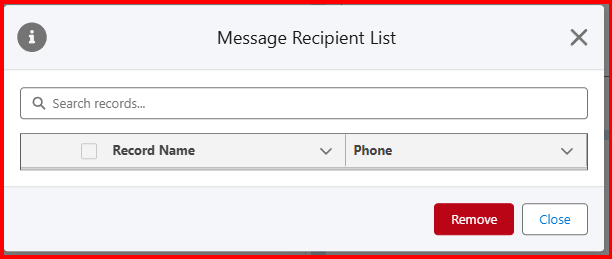
Message Recipient List : In Message Recipient List at the bottom Message Recipient option displays the count of the populated records in the Message Recipient List. At the right side user can see Edit Recipient clicking this option there displays s dialog box where search box – used to search the records, 2 fields like Records Name, Phone, Remove and close buttons are displayed. In this dialog box what are records populated in the Message Recipient List textbox those records are displayed if user want to know which records usr has selected and which records to be removed for that purpose this dialog box is very much useful.
f. SMS ChatBox :
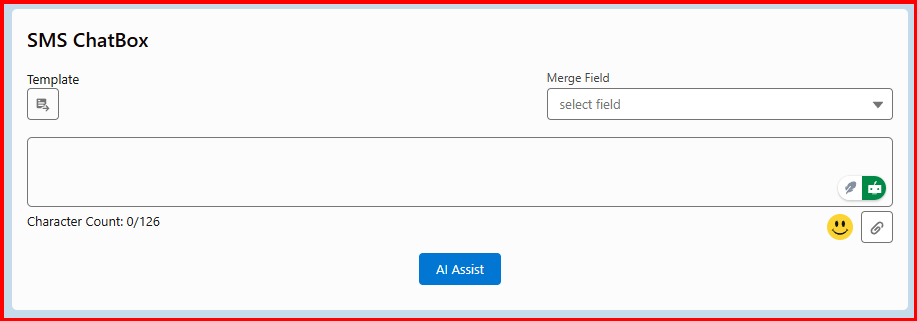
All the icons in the SMS ChatBox is stateful means if user clicks that icon it displays and if it needs to be closed then click the same icon.
1.Templates:
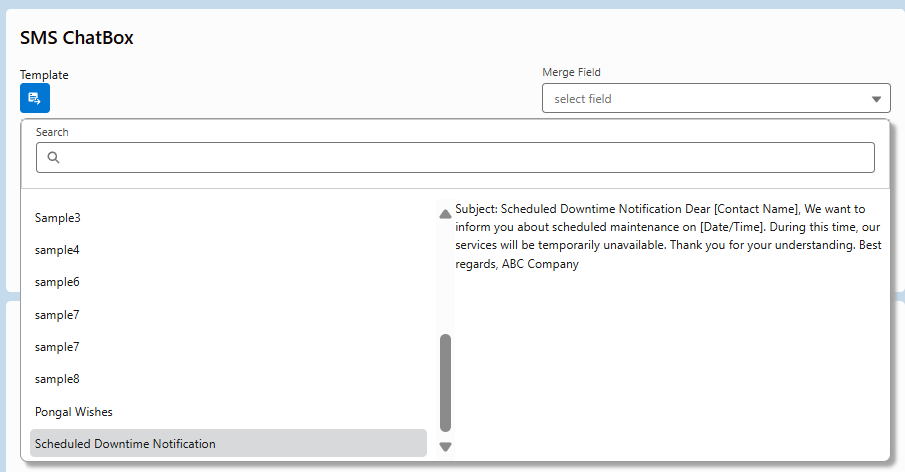
Open the Bulk UI component. Click on the “Template” option in the SMS chatbox. Select a previously created template name. When a template is selected, its content is populated in the chatbox. Admin/power/normal users can edit the pre-filled content as required.
NOTE: New templates can be created and saved successfully under the “Message Templates” tab.
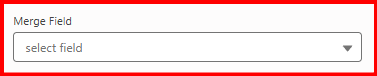
2.Merge Fields: It consists of 2 options. Select Merge Object and Select Merge Fields. A relevant field appears in the Select Merge Fields option based on the object you selected in the Select Merge Object option. In tabs Whatever object user select related fields only appear suppose if it is campaign then Campaign then that records members object should have Lookup relationship to the Contact object, if that records object has lookup relationship to the Contact object then Message Opt Out in contact object should be true(checked) or records members object should be contact object itself.
3.Attachments or Text Files—can send pictures or files.
Note: You can only upload one file at a time. For instance, choose and upload each file separately if you need to send five images. It does not allow multi-select functionality.
4.Emojis—can send 18 types of emojis.
5.Messages can send messages up to emojis—126
NOTE : While creating templates make sure message text should not be greater than 126 characters characters and not more than that.
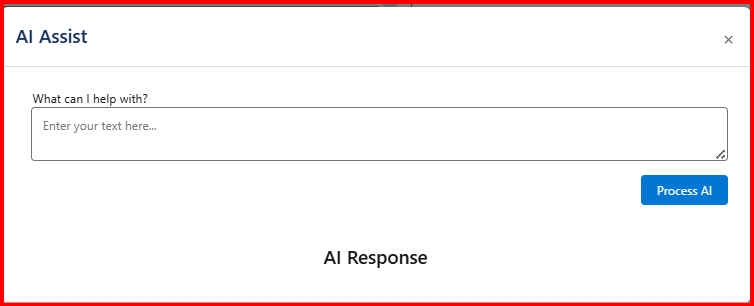
6.AI Assist: Type a message in the chatbox. Click the AI Assist button. Verify a popup opens, and the text from the chatbox populates into the AI Assist textbox. Click the PROCESS AI button. Observe the response generated under AI RESPONSE. Click the displayed response, and verify it populates directly into the chatbox.Alternatively, click the AI Assist button without text in the chatbox. Type a query in the popup What can I help with? textbox.Click the PROCESS AI button.Verify the response generated and its ability to populate into the chatbox when clicked.
7.Message Controls : It has 3 options
a. Select a Channel: Select a channel option displays the channel or list of channels only to the users who are assigned to those channels.
b. DATE : In the date field, select current or future dates, not the previous dates.
c. TIME : Choose the present or future timings that are shown in the Time box. You can also alter the timings, but not the earlier timings.

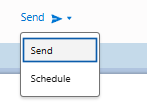
d.SEND: Only when records are chosen in the Message Recipient Picker and the SMS ChatBox’s message textbox is not null is it visible. There are two options on this send button: send and schedule. Send means to send the message at this moment, whereas schedule means to send on a specific day and time.
6.Color settings: In this option we can see
TEXT COLOR:
Initial pic – Default color

After Change

To alter the color of the text in the BULK UI component. Choose the Text Color option in the settings. To view the hexadecimal color palette, click on the dropdown menu. From the palette, choose the necessary color. Click “Save.” Clicking Save should instantly alter it to the chosen color.
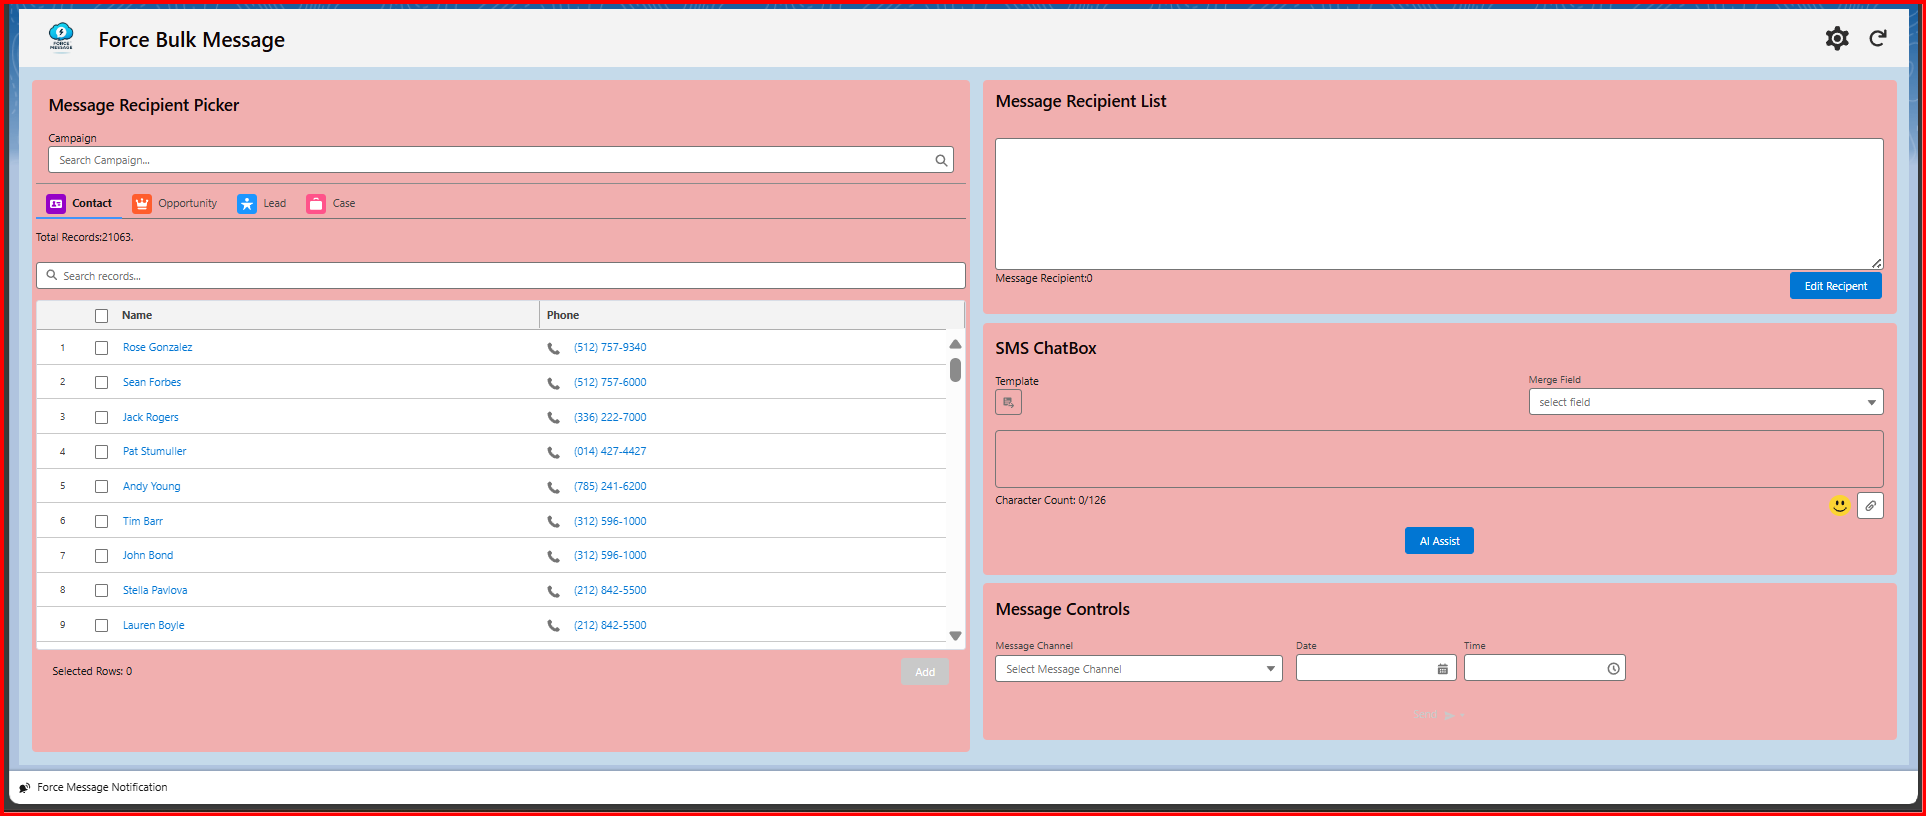
Bulk Background Color:
To alter the color of the background in the Bulk UI component. Choose the Bulk Background Color option in the settings. To view the hexadecimal color palette, click on the dropdown menu. From the palette, choose the necessary color. Click “Save.” Clicking Save should instantly alter it to the chosen color.
Initial pic – Default color

After changing the color
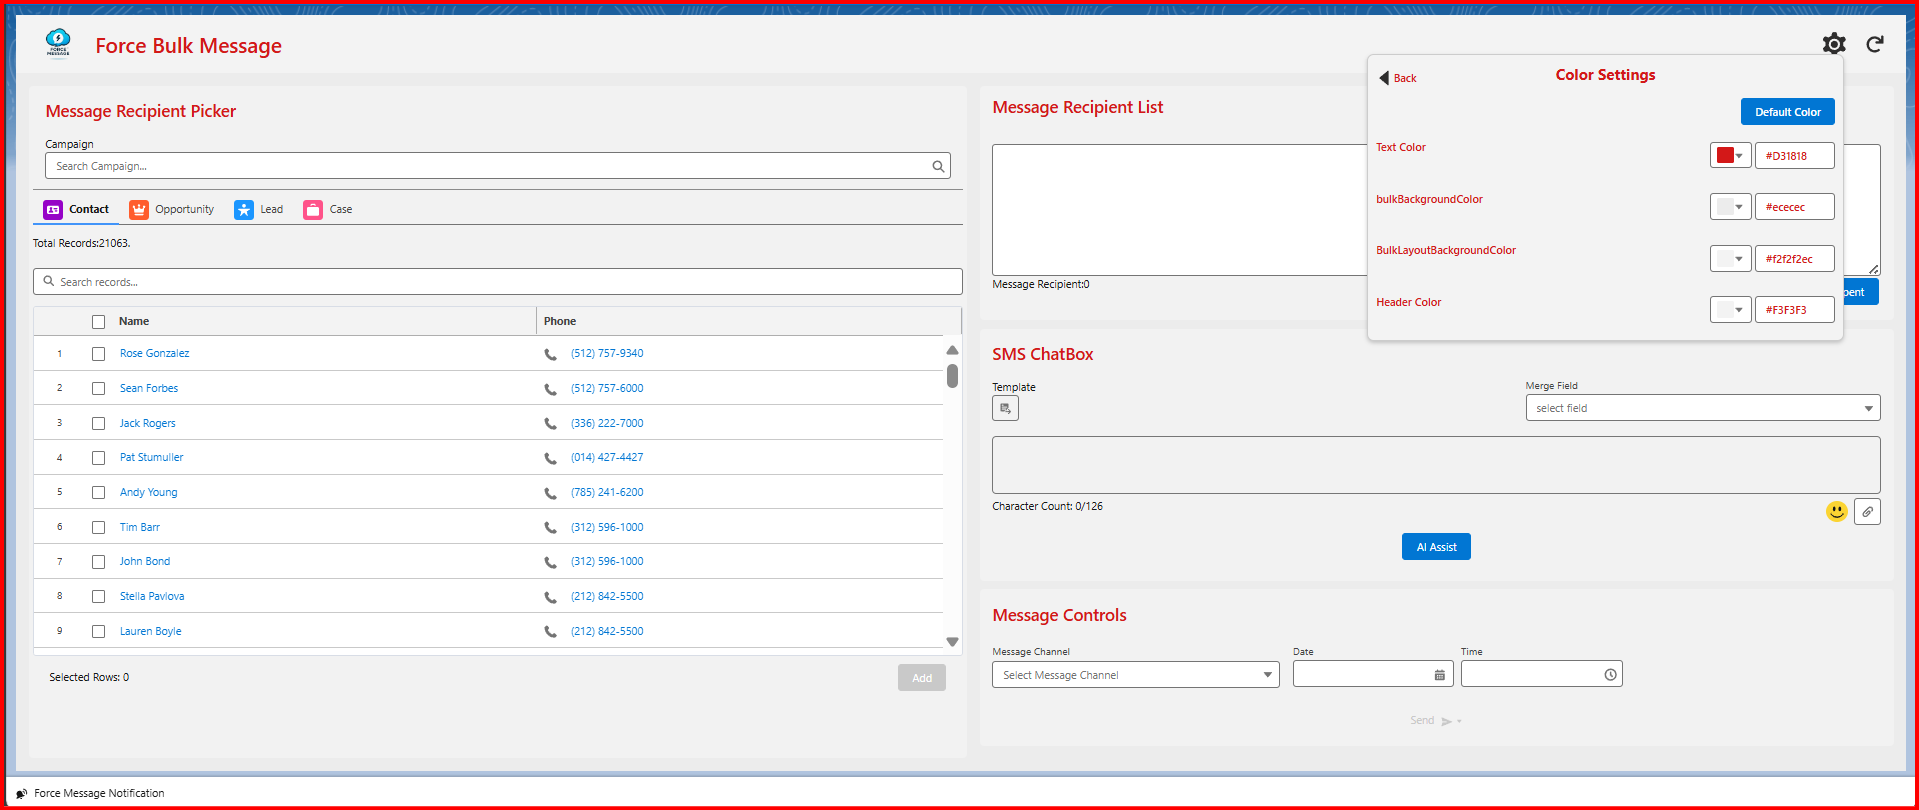
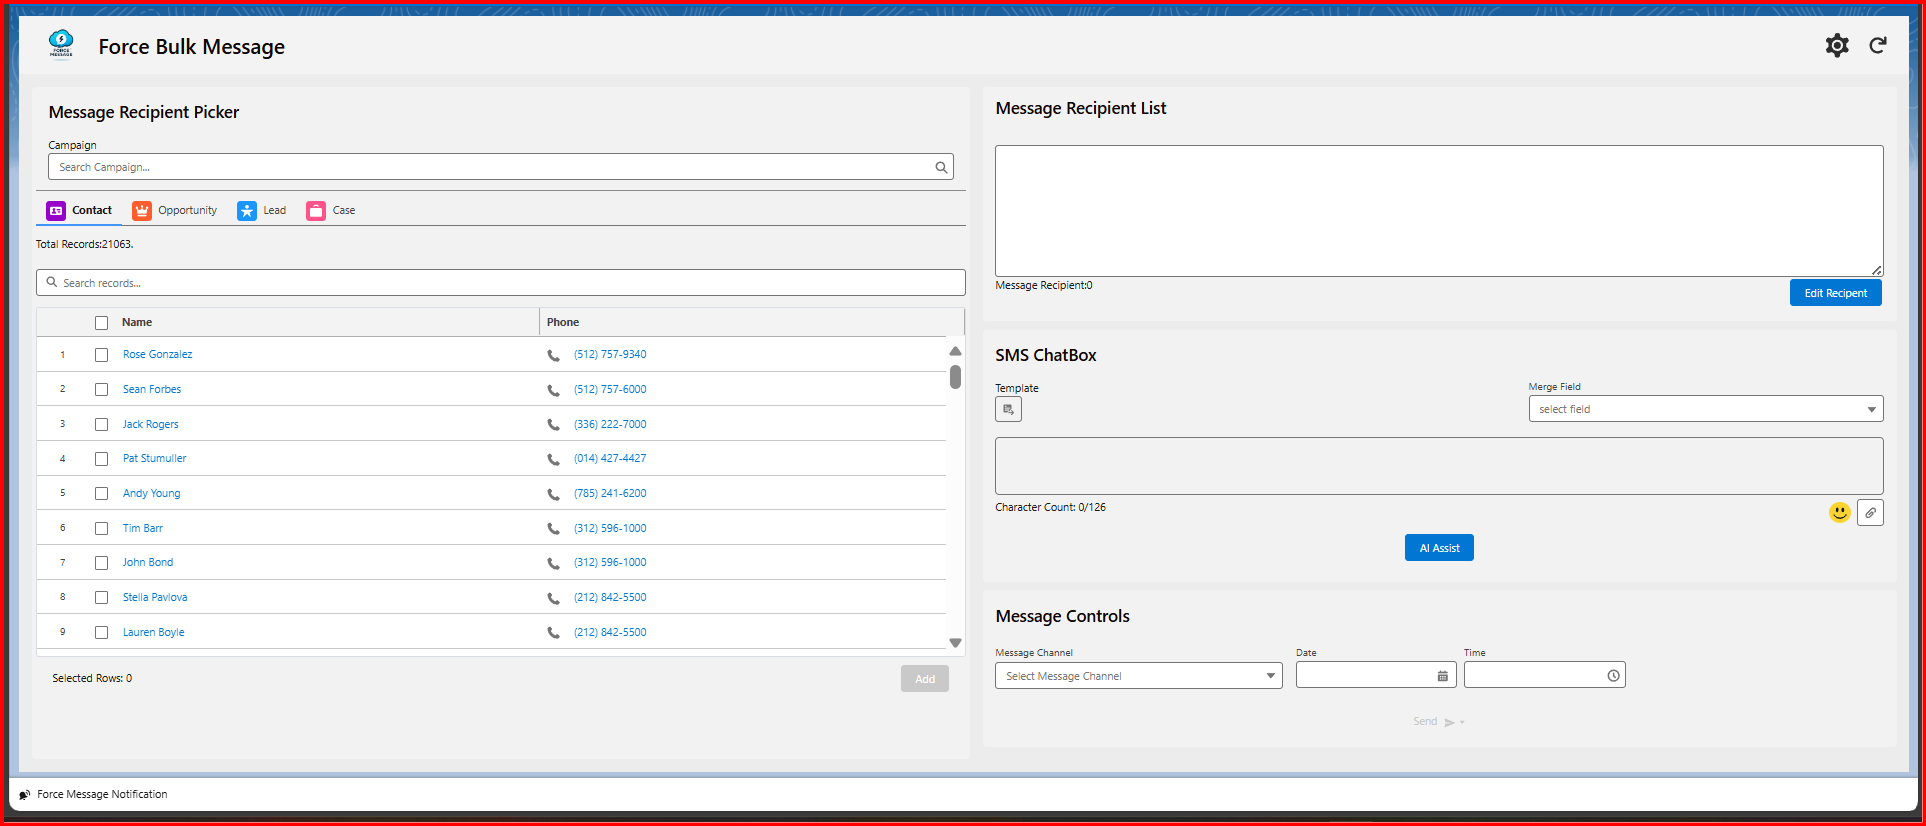
Bulk Layout Background Color:
To alter the color of the bulk layoutbackground BackGround color in the Bulk UI component. Choose the Bulk Layout Background Color option in the settings. To view the hexadecimal color palette, click on the dropdown menu. From the palette, choose the necessary color. Click “Save.” Clicking Save should instantly alter it to the chosen color.
BEFORE CHANGES

AFTER CHANGES
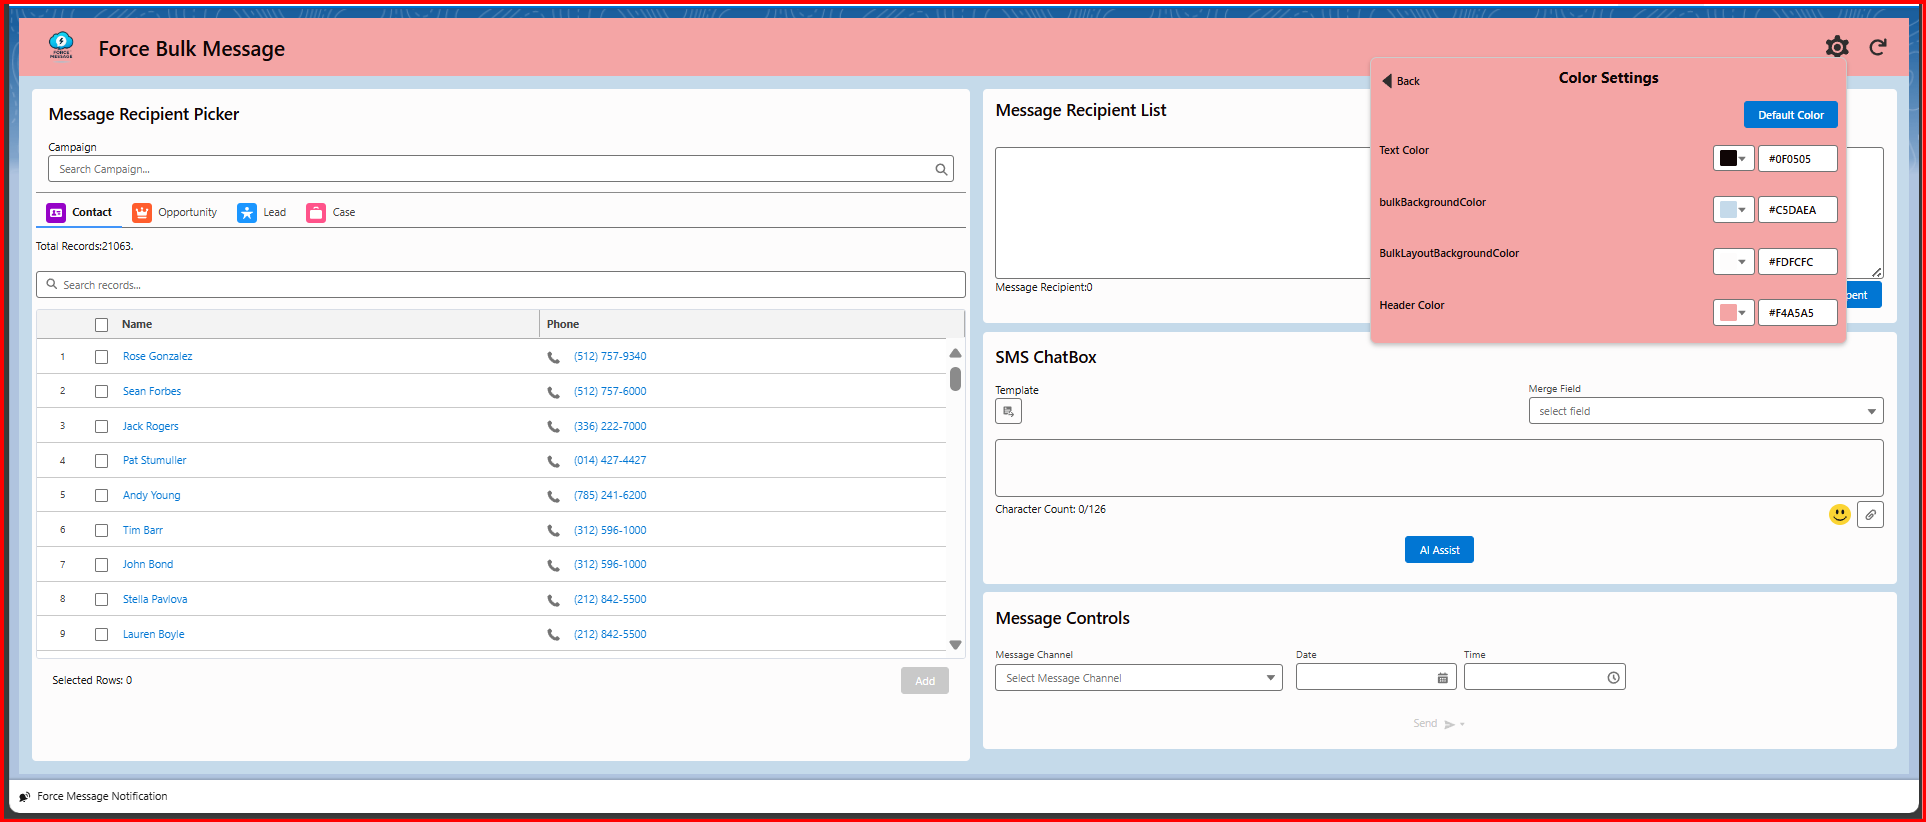
Header Color:
To alter the color of the header in the Bulk UI component. Choose the Header Color option in the settings. To view the hexadecimal color palette, click on the dropdown menu. From the palette, choose the necessary color. Click “Save.” Clicking Save should instantly alter it to the chosen color.
BEFORE CHANGES
AFTER CHANGES


Leave a Reply